Thursday 29 December 2022

Work in Progress

Some pictures to show a bit of end of year progress on my several on-going projects......2022 has cetainly had its challenges both real world and gaming wise for me, but its ending on a fairly positive note gaming wise. 

Without further ado here are some of my more recent works:

Firstly some Pendraken 10mm Irish Confederate pike and shot units for refighting the Battle of Benburb 1646 using For King and Parliament rules. The figures were painted, excellently as usual, by Paul R.

I based them up and added the flags labels etc. We are looking to refight some Irish battles in 2023 now that we have finished the Celtic Fringe "house rules" for FK&P and are putting the finishing touches to our take on Montrose's campaign in Scotland in 1644 - 45.  

Onto a 1944-45 Soviet Tank Corps Motorcycle Battalion for Spearhead using lease-lend equipment. At the top are 2 Heroics and Ros 1/300th scale SU-57's - a Soviet 76mm AT gun mounted on a American M3/5 halftrack. Below them are 3 Baccus 1/300th scale M3A1 Scout cars carrying a SMG armed recce company - they're very nice models but a considerably bigger compared with the H&R halftracks, which I believe use the same, or very similar chassis to the wheeled scout cars? 

A shot of the whole battalion, rounded out by the HQ and a Tank company of British lease-lend Valentine IX tanks and another company of SMG armed recce company, this time mounted on motorcycles.


Next up is some 1980's Danish Army kit. Firstly 1/300th Heroics and Ros Danish Army Centurion Mk 5/2 DK's for Modern Spearhead. These are various company sized units (10 tanks per company) that make up part of the tank and mechanised battalions of one of the mechanised brigades. Up until 1990 the two "regular" Mechanised Brigades of the Zeeland Divison were equipped with these upgraded Centurions, while the tank companies in the better known Jutland Division were equipped with German manufactured Leopard 1A3's (4 companies of which are on the bench to do next). 

We are looking at playing a MSH game in February 2023 depicting the Polish 6th Parachute Division (a brigade only actually) dropping into Zeeland in the opening days of a hypothetical 1985 "Cold War goes hot" scenario and holding until relieved by follow on Polish and East German mechanised forces.  

A closer view of the very nicely sculpted H&R model with the laser rangefinder hood next to the main 105mm gun.

Danish brigade support weapons - Jeep and M113 mounted TOW ATGW's in front then a company of Hamlet (US sourced Redeye) SAM's with Landrover transport and a full squadron from the Corps level recce battalion behind them. Equipped with M41's, and from the late 1980's updated M41 DK1's which you can see at the top left, another very nice fairly recent H&R model.


The recce squadron close up, with M41's (and M41 DK1's for late 80's games in the back) on the left with 3 recce sections in M151 Jeeps on the right with a M113 mechanised platoon and M125 mortar vehicle behind to give a bit more solid support if required once contact has been made.

And that's it for now. Thanks for visiting my blog. For me 2023 is going to be a year of (at least trying to!) finishing off existing unfinished projects....though like many gamers out there I'm sure its a resolution they make most years! 

Have a good 2023 both gaming and real world wise.


Monday 14 November 2022

Battle of Justice Mills - September 13 1644


To: The Committee of Estates
From: Lord Balfour of Burleigh 

The Rebel Montrose was bought to battle outside Aberdeen on Friday the 13th day of September of the year 1644 by our forces defending that fair city from the King's men, being mainly drawn from the city garrison as well as both local men of quality and their diverse troops of horse and the Aberdeenshire militia called out in defence of their homes. 
 
The battlefield was near the outskirts of the town and took place around the Justice Mills and a small valley in which flows the How Burn. The Covenanters occupied the high ground to the left while Montrose's army deployed on the other side of the valley. 
 
The Covenanter left wing is made up of 5 troops of unbrigaded horse, 3 lance armed and 2 pistol armed. On the high ground to their right is Burleigh's own regiment, the city militia and no less than three units of untried Aberdeenshire militia. Montrose's Irish brigade can been seen in the distance deployed initially in the centre of the Royalist line. If you have followed my previous battle reports you will remember that we use the grid based "For King and Parliament" ruleset (which are a very good set of rules) and 10mm figures, mainly from Pendraken Miniatures.

The Covenanter right flank showing the Upper and Lower Justice Mills and Sir John Forbes's small cavalry brigade as initially deployed and Forbes's Regiment in reserve in the rear.
     
The action opened with a thunderous cannonade, which happily dispersed a small party of Irish picked men (a unit of forlorn hope). Montrose and his remaining Irishes, organised into three regiments of musket armed troops, did then maneuver to oppose our left flank, while the other rebels did initially merely observe our forces arrayed before them on the hills around the Upper and Lower Mills for the most part.
 
My Lord Burleigh did try in vain to manuvere what infantry he could to oppose the rebels, and our troops of horse of that wing, under diverse command, did of necessity individually bravely close with the rebels and engage them with lance, pistol and sword in hand to hand combat. Despite a fearful charge by Lord Fraiser's pistol armed troop of horse which did much execution amongst the Irishes lead by one Colonel MacDonnell and would have seen them off (3 hits!!) the cess of the Irish was with them and, with the assistance of the infamous gael leader Colkitto, who was leading their brigade, they did repulse the charge without disorder (3 saves!!).
 
Lord Frasier's Horse inflicts 3 hits on MacDonnell's unit of Irish cammanded shot (8, 9, 10), enough to remove the unit from the table....But equally spectacularly the Royalists pull 3 chits with high enough scores (7,7,9) to negate all three hits.....  

The double musket fire by the experienced Irish musket men eventually overcame several of our troops of horse which were forced from the field.


A later turn and all three veteran Irish units are still present, with MacDonnell threatening to outflank the remaining Covenanter cavalry on the left flank.  

On our right Sir John Forbes' bravery must be commended as he did eventually lead most of his brigade over How Burn through a hail of fire from the rebel Montrose's own cannons (Lord Alexander Keith's troop of lancers being put to the rout by a unfortunate hit) and engaged a small brigade of rebels under the command of James Hay. Sir John lead Lord Lewis Gordon's troop up the hill and dispersed Nat Gordon's troop of horse by the fire of their pistols alone. However as they did not need to pursue Nat Gordon's men from the field the rebel cannon were able to fire their final salvo at Forbes men who were this time unwilling to stand the fierce bombardment.
 
Gordon vs Gordon - on the far hill Lord Lewis Gordon's Troop charges home uphill into Nat Gordon's small unit of Royalist horse which has already been disordered previously by the Covenanter Artillery unit in the foreground. Lord Lewis's pistol fire was enough to destroy the unfortunate Royalist unit, boosting the Covenanter victory medal tally to 3 in total (impressive eh!!).  However the next turn saw Lord Lewis's unit dispersed by a shot from the Royalist Artillery, leaving Sir John Forbes with only his own troop left to face the Rebels.

So my Lords I must report that the rebels, having seen off our cavalry, claimed victory on collecting 8 victory medals to 3 and eagerly approached the now open city to rapaciously carry off much loot and treasure belonging to its peaceful citizens.

I trust that the rebel Montrose will one day finally be defeated and he should recognise that on that occasion he will be called to answer for his many and diverse actions.        

Yours etc 
Lord Balfour of Burleigh
 
This was another of our test games covering Montrose's campaign in Scotland in 1644/45 using our "Celtic Fringe" house rules. The extra rules worked well and give a good "Celtic" flavour to the main FK&P rules. Next up will probably be the fight at Philiphaugh - can Leslie's experienced troopers finally end Montrose's "year of victories", or will he manage to live to fight another day?


Monday 31 October 2022

Montrose's High Tide - Kilsyth 15 August 1645

Background

Following his victory against Baillie at Alford Montrose moved south at a leisurely pace to try and draw off any Covenanter reprisals against the Gordon’s heartlands round Huntly. His string of victories now began paying dividends as he was now joined by considerable numbers of reinforcements. Firstly MacColla returned from his recruiting drive in the Western Highlands, bringing in some 1600 fighting men from the Clanranald, MacLean and various other Western clans, all allies of the McDonald’s in their feud with the Campbells.  Slower to return, but equally welcome, was Viscount Aboyne with some 300 Gordon Horse and 120 dragoons. With around 5000 men Montrose now found himself at the head of the largest army he would command in his 1644-45 campaign.   

 After Alford Baillie tried to quit his post as Commander in Chief of the Covenanter forces in Scotland. His resignation was not wholly accepted by the Committee of Estates of the Scottish parliament. Instead he was temporally retained, under the close supervision of the Committee, until Major-General Munro, the current commander of the Covenant Army serving in Ireland, could be recalled to take over the Scottish command.

 The Covenanters began an ambitious recruiting campaign to try and bolster the number of troops available to them in Scotland, but Montrose’s progress towards the lowland heartlands meant that there was no time to train new replacements properly. So, beyond the few remaining regular units already present in Scotland, themselves hastily filled with survivors of earlier engagements against the Royalists, only a few hastily raised units could be added to the Covenanters ranks.

Amongst these was a newly raised 1200 strong brigade made up of 3 conventionally armed infantry regiments levied in Fifeshire which were very reluctant to serve outside the boundaries of the shire. To further bolster their forces in Scotland a further 1200 experienced infantrymen were detached from various Covenanter regiments in Ireland and sent back to Scotland post haste to serve under Ballie.

 A separate force of some 1500 men under the Earl of Lanark that had been raised in the Clydeside region was marching to join Baillie’s command.  

 Advancing towards Glasgow Montrose crossed the field of Bannockburn the day before the battle was fought. He was seeming well aware of the Covenanters plans and drew up on the high ground to the East of Kilsyth village above the Glasgow to Stirling road where the enemy was expected to appear, but they did not arrive by that route.

Instead Baillie appeared from the East as the Committee had instructed him to attack at once with the forces he had at hand, without waiting to link up with Lanark’s men. Baillie’s plan was to use dead ground on Montrose’s right flank to screen his advance and then seize the high ground behind Montrose’s positions near Auchincloch.

However Baillie’s carefully laid plan soon came adrift when his advance guard decided to take a short cut to their objective which enabled them to be spotted by the Royalists, who quickly reorientated their force to meet the still marching Covenanters....  

Playing The Game

As we are currently developing a few scenarios I will not include my OOB and map that we used for this refight as I have done in my previous occasional battle reports. The game was played over two sessions with four players, two on each side. We use "For King and Parliament" rules with local house rules for playing the "Celtic Fringe" which encompass the unique nature of the smaller scale actions in Scotland and Ireland during the War of the Three Kingdoms from 1639 - 51.


View of the terrain and inital Covenanter deployment in response to the Royalist army approaching from the west (top left of the picture). The Earl of Balcarres' cavalry brigade on the far right with Major General Baillie's more experienced infantry brigade on the left. Major General Holborne's small infantry brigade trails behind Baillie. The inexperienced brigade of Fifeshire militia under Major General John Leslie remains off-board till turn two. 

The Royalists deploy for battle - nearest the camera Montrose choose to join with Col Manus O'Cahan's Irish Brigade made up of three units of veteran commanded shot. Across the Banton Burn is Farquharson of Inverary's small but experienced brigade of regular Gordon foot. Next up on the hill is MacColla's Highland Brigade made up mainly of MacDonald, Clanranald, MacDonell and MacLean clansmen from the Western highlands. Lastly in the distance beyond Drum Burn is Nathaniel Gordon's small brigade of Gordon Horse, representing half of Montrose's cavalry contingent. The rest of the cavalry under Viscount Aboyne, representing the right wing of Montrose's intial deployment has further to travel so it will arrive on turn 2 in any four of the boxes containing markers that can be seen on the hills in the top left of the picture. 

Major General Baillie's view of the advancing Royalists as his own troops deploy. Gordon of Gight's troop on the right was very eager to engage with the Covenanters.......

Who were not slow to take up the challenge, with Forbes of Craigevair's troop from Balcarres' own regiment charging and disbursing Gight's troop (Troops of Horse are only small one hit units in FK&P).

This was to prove one of the few sucesses for the Covenanters as next turn Forbes' troop was in turn destroyed by Nathaniel Gordon's regiment. Meanwhile Aboyne's brigade arrived (top of the picture) and was committed in support of the Royalist left wing.

The Royalist infantry continues it advance in the centre and their left wing. Baillie's brigade has taken up good defensive positions along Banton Burn opposite MacColla's Highlanders on the central hill. Meanwhile the Covenanter's Fifeshire militia brigade arrives and Holborne's infantry are committed to defend the Convenant right wing.      

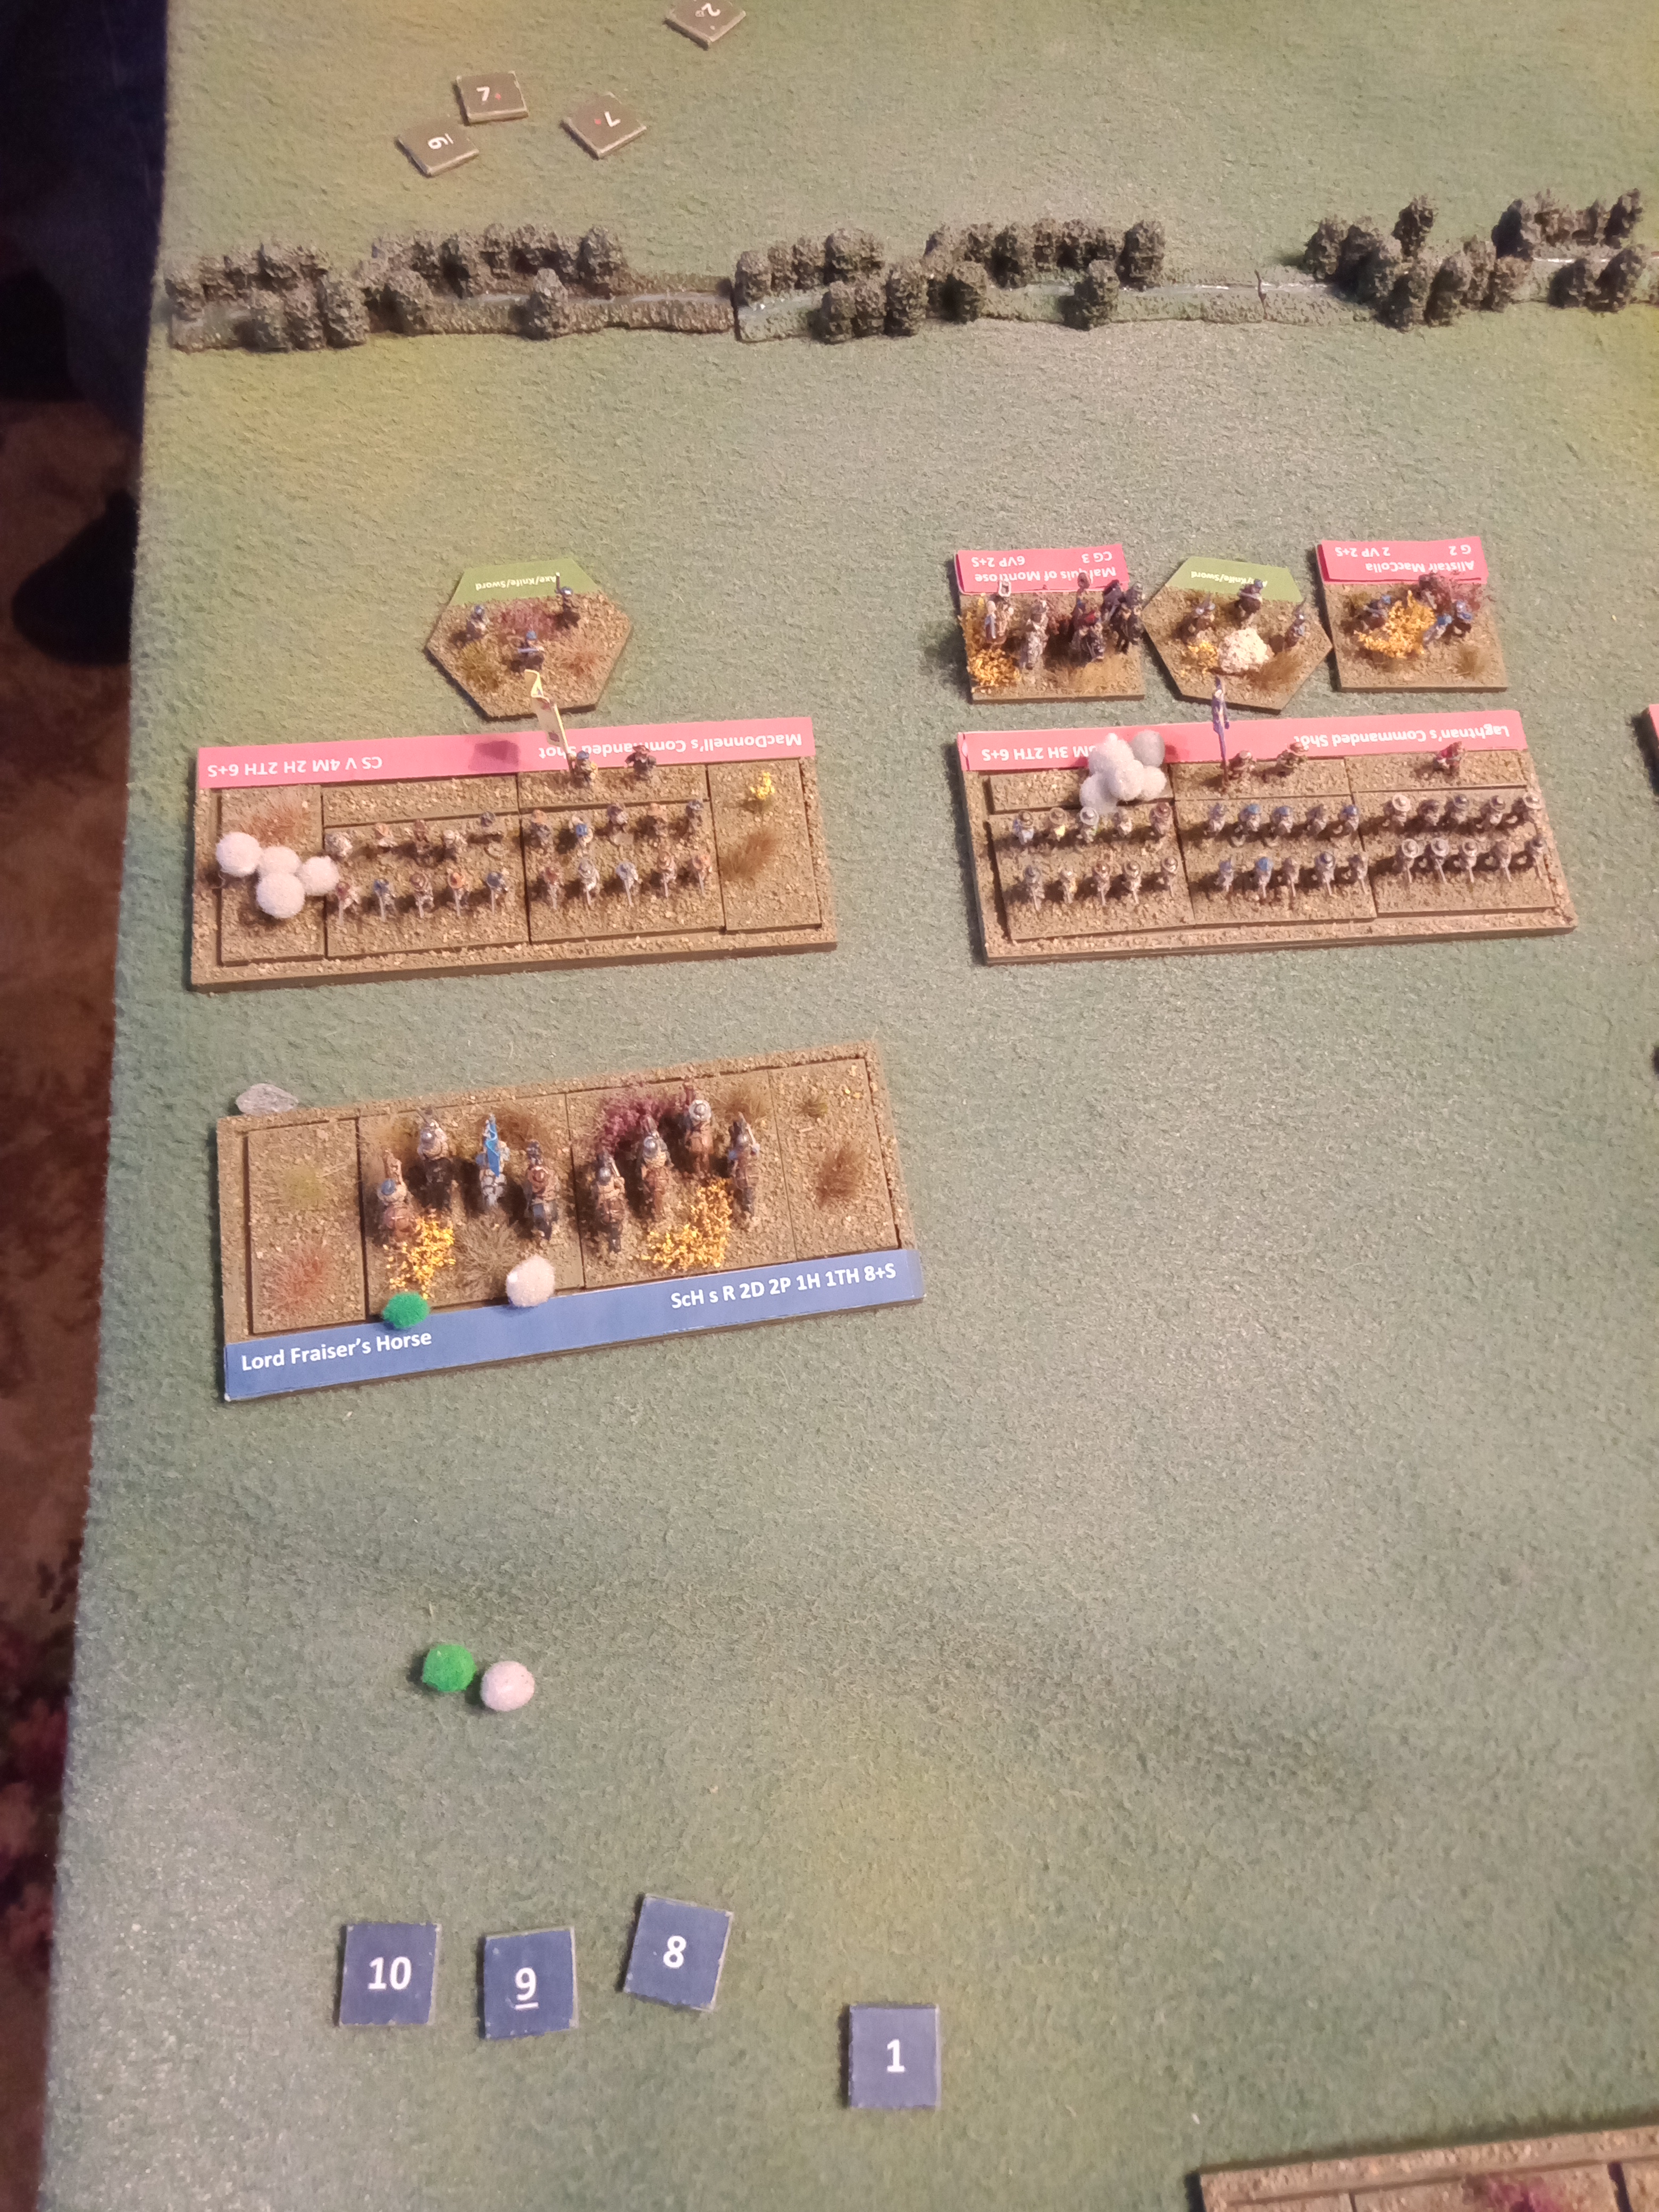
Balcarres brigade soon came under further pressure with Aboyne's cavalry disbursing Barclay's small unit of lancers (In pursuit down the table edge) and Haldane's commanded shot being roughed up by Clan MacDonnell's small array in the centre of the picture. But support is at hand from Holborne's infantry brigade inclining to the right.   

On the Covenanter left the Irish brigade, lead by Montrose himself, attempted to outflank Baillie's line by wotking through the rough terrain. They succeeded in dispatching one of Col Home's redcoat battalia's after a massive fight where the smaller but veteran Irish units survived thanks to the sacrifice of their AKS detachments. In the centre the highlanders and Gordon regulars pause temporaily to see how the Irish Brigade attack works. At the bottom of the picture Major General Leslie's Fifeshire brigade nervously awaits the approaching Royalists.

Things start to really unwind for the Covenanters at this stage of the game. Major General Baillie manages to turn Col Home's Second battalia to face the oncoming Irish but it takes a hit from thier salvee charge and in testing (since he was with the unit) Baillie is hit and is carried badly wounded from the field (1 and 8 chits drawn), leaving his brigade without a commander and handing over 5 victory medals to the Royalist players.

With their flanks secure MacColla's highlanders charge in against their old foes The Marquis of Argyle's Highland Regiment, but they get as good as they get, each side taking a hit. Meanwhile Kennedy's battalion, made up of surviviors from units Auldearn and Alford, fails its untried test dispite being classed as veterans and become disordered, taking another hit from the Clan MacLean as they charge across Banton Burn.

Another turn and Kennedy's battalia takes a third and final hit, leaving the space for Clan MacLean to advance into next to Argyle's now surrounded battalia. Behind Kennedy's now destroyed unit Henderson of Fordell's Fife militia fails thier untried test and becomes disordered.....its almost time to go home for them!

Given the long history of animosity of the clan feud between the Campbells and MacDonalds the Marquis of Argyle's regiment fights to the bitter end against the Clanranald highlanders as the rest of the Covenanter army begins to slip away in its now familiar rout in the face of Montrose's once more victorous army. Purhaps summing up the battle Argyle can only pull two 1's for its final turn of hand to hand combat, then a 3 and a 4 to try and save the hits against it. 

The Covenanters hand over their last of 18 victory medals, though they did manage to receive 3 for the two Royalist units that were destroyed in the fighting. 

Montrose is now the undesputed master of Scotland, for the time being anyway.  

Baillie's army was the last significant Covenanter force in Scotland. If the Covenanters are to ever defeat him they will now have to look to their sizeable army fighting with the Parliamentarians in the North of England against Charles I for assistance..... will David Leslie be able to check Montrose's seemingly unstoppable progress? 

Conclusions

The test game for the scenario worked well and gave a pretty historical 18:3 victory to the Royalists. Apart from a couple of minor tweaks I am happy with it as it is written. The victory conditions do not need changing and the feeling was the game was fairly even, though Roy and I both had some really forgettable chit draws (I played Ballie and Leslie while Roy ran the other two Covenanter brigades) which certainly didn't help matters.

For future games I do intend to introduce a couple of visual hacks to improve the way the game looks a little:

  • Use unit basewidth wide (90 or 130mm in our case) smoke markers if firing or in close combat using black powder weapons.
  • Make sure that small units have one less troop base (2 instead of 3) so they are visually easily identifible.

Thanks to D Guy for the scenario grid map from his previous work, to Paul R for painting all the 10mm troops over the past few years and for playing Montrose so well and also to Roy and Lester for coming along on our War of the Three Kingdoms journey.   


Tuesday 26 July 2022

Newtyle 1645: Montrose confronts Crawford - Lindsay in Angus


This a a brief write-up of a small action I recently played myself to try out a few ideas using our Celtic Fringe house rules for the "For King and Parliament" ruleset.

After his victory at Auldearn in May 1645 Montrose continued to operate in North East Scotland, being careful to protect the lands of the Gordon clan, one of his two main sources of troops. Against him the Covenanters reacted to Hurry’s defeat by deploying two further forces in the field to protect the Scottish Lowlands. The main force under the reluctant command of Baillie led Montrose on a merry chase round Strathbogie and Aberdeenshire for two months before being finally bought to battle at Alford on the 2 July 1645. Meanwhile, the smaller Covenanter force, commanded by the Earl of Crawford-Lindsay, was based in the Mains of Angus to cover Dundee and Fifeshire against any Royalist threats.

In mid-June 1645 Montrose received word that Crawford-Lindsay (an old school friend of Montrose’s but an ardent Covenanter) was camped at Newtyle in Northern Angus. He saw an opportunity for a quick victory over this smaller force and moved to engage him accordingly. This would take the Royalist force much further South than it had previously operated, and potentially leave the Gordon lands open to attack by Baillie’s now unopposed force. As Montrose’s force travelled down the Braes of Mar and into Glen Clova, to enter Angus the entire Gordon contingent (save Nathaniel Gordon’s troop of horse) peeled off and returned Northwards. Exactly why is unknown but it is speculated that they were ordered to return home by the Earl of Huntly, the senior Gordon leader.

Weighing his options Montrose decided that the attack on Crawford-Lindsay with his remaining forces was not worth the risk and so withdrew with the Gordons. At the time Montrose was only some 7 miles from the Covenanter force. This small battle looks at what might have been if Montrose had decided to continue his plan to confront Crawford-Lindsay’s troops with his remaining force, mainly made up of the Irish Brigade.      

Looking at the area round Newtyle as depicted by the mid C18 Roy military map Montrose would logically have advanced down the Glamis road to approach Newtyle from the East, avoiding the boggy ground to the North. Crawford-Lindsay’s force was evidently based at Hatton Castle (depicted as the Old House of Newtyle on the map) adjacent to the Newtyle Burn and at the time surrounded by walled fields and enclosures. The castle itself is situated on gently rising ground, with steeper hills behind it (but off the map).

Montrose's Force which he will use to attack the Covenanters is quite small, with only five units in total:

Skirmish at Newtyle                          Royalists

LOSE WHEN SURRENDERING

5

VPs


Unit

Type

Save

Hits

VPs

Ammo

Dash

T-H

Cost

Marquis of Montrose

Commanding General, Gallant

2+


3


6

O’Cahan’s Irish Brigade


Colonel Manus O'Cahan

Colonel

2+


1


4


Laghtnan’s Irish Commanded Shot

Commanded Shot, veteran, AKS x1

6+

2

2

4

-

2

9


O’Cahan’s Irish Commanded Shot

Commanded Shot, veteran, AKS x1

6+

2

2

4

-

2

9


MacDonnell’s Irish Regt

P&S Battalia, small, veteran

6+

2

2

3

-

2

8

Alistair McColla’s Brigade


Alistair McColla

Colonel, Gallant

2+


1


5


MacDonnell of Glengarry’s Retinue

Highland Retinue, small, seasoned, Attached Bows x 2

7+

2

2

1

-

2

6


Nat Gordon’s Troop

Swedish horse, small, veteran

6+

1

1

1

3

2

4


Total

VPs =>

13


Total

Cost=>

47


Accept

40

% VP loss


Crawford-Lindsay's small force consists of only three pike and shot battalia (I have deliiberately called this fight a skirmish), but his encampment around Hatton castle is protected by walls and enclosures which can be easily defended.

Skirmish at Newtyle                          Covenanters

LOSE WHEN SURRENDERING

4

VPs


Unit

Type

Save

Hits

VPs

Ammo

Dash

T-H

Cost

Earl of Crawford-Lindsay

Commanding General

2+


2


4


Earl of Crawford-Lindsay's Regiment

P&S Battalia, seasoned

7+

3

3

3

-

2

9


Earl of Cassillis' Regiment

P&S Battalia, seasoned

7+

3

3

3

-

2

9


Earl of Lauderdale's Regiment

P&S Battalia, seasoned

7+

3

3

3

-

2

9


Total

VPs =>

11


Total

Cost=>

31


Accept

40

% VP loss


Stand to!! Covenanter units defend the walls surrounding Hatton Castle as Montrose's force approaches from the North:


Montrose deployed the Irish Brigade on the left, under his personal command, with MacColla's smaller brigade of MacDonnell Highlanders and cavalry to their right: 

 Montrose's wing units were able to advance steadily, but the Irish centre seemed a bit more reticent to close with the enemy,  On the left Laghtnan’s Commanded Shot exchanged fire with Earl of Lauderdale's Regiment, but took a hit. Rather than become disordered for the upcoming melee they choose to loose their AKS marker to absorb the disorder. Over on the right the MacDonnell's conserved their limited fire for the melee:


Montrose urged the centre to advance once again and with some vigour leads the Irish veterans in a series of salvee charges along the Covenanter line. Crawford-Lindsay galloped over to lead his own regiment on the left against the outflanking MacDonnells. With the defensive advantange of the wall aiding their opponents the Royalists only manage to disorder
Crawford-Lindsay's regiment with a single hit (red dot at the top) in thier first charge:

Next turn Montrose attempts to salvee charge with the Irish again, while MacColla leads the MacDonnells in a highland charge onto the open flank of Crawford-Lindsay's regiment. With the situation seemingly well in hand the Royalist cavalry advances to encircle the Covenant force and capture their camp, earning a 1VP chit for doing so under the scenario conditions. After the smoke of numerous volleys has cleared somewhat Montrose observes that this time his tactics have been more sucessful, with both his opponents own and Casiliss's regiments in serious disarray (two red dots each), though on the Royalist left Laghtnan’s Commanded Shot was unable to advance against the enemy (I pulled a 1 chit, ending the brigade's turn):


With his force near breaking point Crawford Lindsay successfully attempts to withdraw his line from the now percarious position behind the walls to the castle and surrounding buildings: 

However Montrose presses the attack and after a hard fight with OCahan’s Commanded Shot Crawford-Lindsay's regiment is routed and the Covenanter force hands 3 more VP to Montrose, ending the encounter in the Royalist's favour: